It started with a power outage. The lights flickered, my UPS screamed, and when everything came back online - I was locked out of my own network. My pfSense VM was down, and I couldn't reach Proxmox to restart it. Why? Because I'd made a rookie mistake: my virtualized router was the gateway to everything, including the hypervisor itself. Classic chicken-and-egg problem.
But here's the thing about failures in a homelab: they're not disasters - they're learning opportunities. That frustrating moment became the spark for something bigger. Instead of just fixing the immediate problem, I decided to rebuild my entire network the right way. And I'm documenting every step so you can learn from my mistakes (and successes) without having to break your own network first.
The Problem with Flat Networks
Like many homelabbers, I started with the classic setup: one network, everything connected, a consumer router handling it all. Plug it in, it works. Simple, right? And honestly, for most people, that's fine. But if you're reading this, you're probably not "most people." You're curious. You want to understand how things actually work. And that curiosity is exactly what separates someone studying for a certification from someone who truly gets this stuff.
Beyond my virtualized router disaster, I had some serious security concerns that would make any Security+ instructor cringe:
- IoT devices - Smart plugs, streaming sticks, and other devices that rarely get security updates, all sitting on the same network as my workstation
- IP cameras - Notoriously insecure devices with full network access
- Guest access - Friends connecting to WiFi could theoretically reach my servers
- No visibility - I had no idea what was talking to what
As someone who teaches security, this setup was not acceptable. I had to find everything on my network. My ISP router provided an IP scheme that was 1 digit away from my previous IP scheme. The ISP's router range is 192.168.1.0/24, my last in pfSense was 192.168.0.0/24 so my first task: see where DHCP put all of my devices and map this flat network and sign in directly to the server to change its IP to one in the current network. All documentation I put together (with a little help from Claude) will be at this Github Repo.
A flat network is one where all devices share the same network segment - they can all communicate directly with each other without going through a router. While simple to set up, this means your smart TV can "see" your file server, your guest's phone can reach your security cameras, and malware on one device can spread to everything else.
DHCP (Dynamic Host Configuration Protocol) automatically assigns IP addresses to devices when they connect to a network. When I switched routers, all my devices got new IP addresses from the new DHCP server - which is why I had to "find" everything again.
The notation 192.168.1.0/24 is called CIDR (Classless Inter-Domain Routing) notation. The "/24" means the first 24 bits are the network portion, leaving 8 bits for hosts. This gives you 254 usable addresses (192.168.1.1 through 192.168.1.254). The ".0" address is the network ID, and ".255" is the broadcast address.
For the exam: Know that DHCP uses ports 67 (server) and 68 (client). Understand the DORA process: Discover, Offer, Request, Acknowledge. Private IP ranges are 10.0.0.0/8, 172.16.0.0/12, and 192.168.0.0/16. A /24 subnet has a mask of 255.255.255.0.

The Vision: Defense in Depth
Here's where it gets exciting. I didn't want to just "fix" my network - I wanted to build something I'd be proud of. Something that implements the same security principles you'll find in enterprise environments and on your CompTIA exams. The goal? Transform my chaotic flat network into a properly segmented, defense-in-depth architecture that would make a SOC analyst nod in approval.
The core principles I'm building around:
- Least privilege - Devices only access what they absolutely need
- Network segmentation - Isolate by trust level
- Defense in depth - Multiple layers of security
- Visibility - Know what's happening on my network
These four principles appear throughout Security+, Network+, and even A+. Let's break them down:
Least Privilege means giving users, devices, and applications only the minimum permissions they need to function. Your smart thermostat needs internet access to check the weather - it doesn't need access to your file server. If a device gets compromised, limited permissions limit the damage.
Network Segmentation divides your network into isolated zones. Even if an attacker compromises your IoT VLAN, they can't pivot to your trusted workstation VLAN without passing through the firewall - where you can block or detect them.
Defense in Depth layers multiple security controls so that if one fails, others still protect you. Think of a castle: moat, walls, guards, locked doors. In networking: firewall, VLANs, IDS/IPS, endpoint security, strong passwords. No single control is perfect, so we stack them.
For the exam: These concepts map directly to exam objectives. Know the CIA triad (Confidentiality, Integrity, Availability). Understand that defense in depth is also called "layered security." Zero Trust ("never trust, always verify") builds on least privilege.
The VLAN Architecture
This is where theory meets practice - and honestly, where the real fun begins. After diving deep into enterprise network design patterns and NIST frameworks (the same stuff you'll encounter in Security+ and Network+), I designed a seven-VLAN architecture. Could I have done fewer VLANs? Sure. But this is a learning environment. I'd rather over-engineer it now and understand every piece than take shortcuts and miss the educational value.
| VLAN | Subnet | Purpose | Internet | Internal |
|---|---|---|---|---|
| 1 | 10.0.1.0/24 | Management | Yes | Full |
| 10 | 10.0.10.0/24 | Trusted | Yes | Most |
| 20 | 10.0.20.0/24 | Servers | Yes | Limited |
| 30 | 10.0.30.0/24 | IoT | Yes | Blocked |
| 40 | 10.0.40.0/24 | Cameras | No | Blocked |
| 50 | 10.0.50.0/24 | Guest | Yes | Blocked |
| 99 | 10.0.99.0/24 | Security | Yes | Read-only |
A VLAN (Virtual Local Area Network) creates separate broadcast domains on a single physical switch. Without VLANs, a broadcast from any device reaches every other device on the switch. With VLANs, broadcasts stay within their assigned VLAN - devices on VLAN 10 never see broadcasts from VLAN 30.
How VLANs work: Each switch port is assigned to a VLAN. When a device sends traffic, the switch adds a VLAN tag (using the IEEE 802.1Q standard) that identifies which VLAN it belongs to. Trunk ports carry traffic for multiple VLANs between switches, while access ports connect to end devices on a single VLAN.
Inter-VLAN routing: Devices on different VLANs can't communicate directly - they need a Layer 3 device (router or firewall) to route between them. This is the security benefit: you control exactly what traffic can flow between VLANs with firewall rules.
For the exam: VLANs operate at Layer 2 (Data Link layer). The native VLAN (often VLAN 1) carries untagged traffic - this can be a security risk if not properly configured. Know the difference between access ports (one VLAN, untagged) and trunk ports (multiple VLANs, tagged).
Notice the camera VLAN (40) - no internet access at all. Those devices have zero business phoning home to servers in China. The security VLAN (99) will host my IDS/IPS system with read-only access to monitor traffic across all segments.

The Hardware
Now for my favorite part - the gear. There's something deeply satisfying about racking equipment, running cables, and watching LEDs blink to life. You can read about networking all day, but until you've physically configured a managed switch or watched traffic flow through your own firewall, it's all just abstract concepts. This is where certifications become real skills.
Here's what I'm working with:
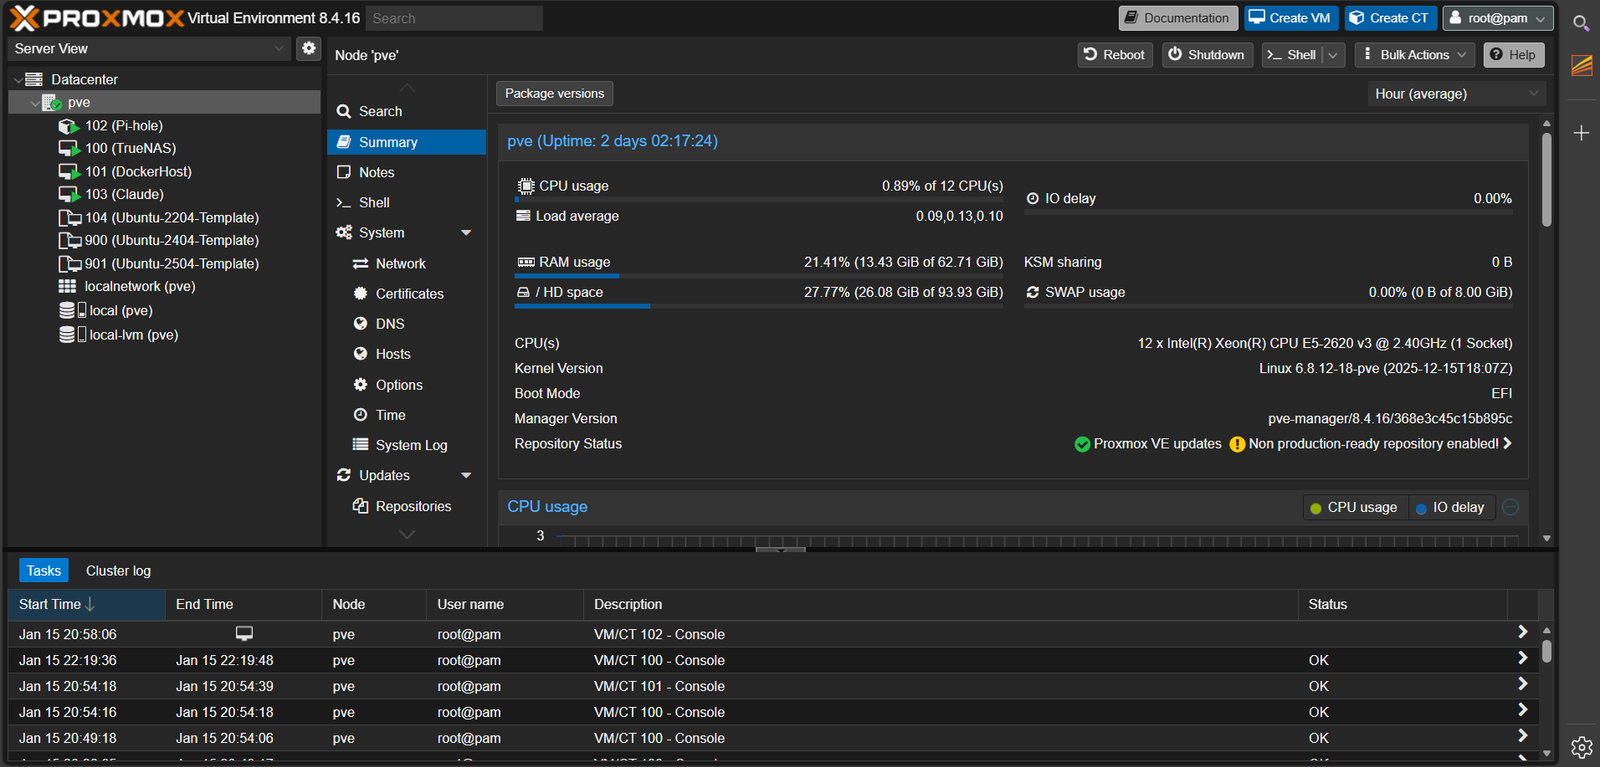
Hypervisor: Proxmox VE
A hypervisor is software that creates and manages virtual machines (VMs). Think of it like an apartment building manager - the building (physical server) has resources (CPU, RAM, storage), and the manager (hypervisor) divides these among tenants (virtual machines), keeping them isolated while sharing the same infrastructure.
There are two types you'll see on the exam:
- Type 1 (Bare-Metal) - Installs directly on hardware with no host OS. Better performance and security. Examples: VMware ESXi, Microsoft Hyper-V, Proxmox VE
- Type 2 (Hosted) - Runs as an application on top of an existing OS. Easier to set up but more overhead. Examples: VirtualBox, VMware Workstation
Proxmox VE is a free, open-source Type 1 hypervisor based on Debian Linux. I chose it because:
- No licensing costs - Enterprise features without the VMware price tag
- Web-based management - Access from any browser, no special client needed
- Supports both VMs and containers - Run full virtual machines or lightweight LXC containers
- Great for learning - Hands-on experience with enterprise virtualization concepts
For the exam, remember: virtualization requires CPU support (Intel VT-x or AMD-V), and you should understand concepts like snapshots, cloning, resource allocation, and the difference between host and guest operating systems.
My main virtualization host is an HP Z440 workstation running Proxmox:
- Intel Xeon E5-2620 v3 (6 cores, 12 threads)
- 64GB DDR4 ECC RAM
- 1x 1Gbit + 2x 10Gbit NICs (Intel X540)
Network Switch: TP-Link TL-SG1428PE
A 28-port managed PoE+ switch with 250W power budget. This handles:
- VLAN tagging and segmentation
- PoE power for cameras and access point
- SPAN port for traffic mirroring to IDS
Managed vs Unmanaged Switches: An unmanaged switch is plug-and-play - it just forwards traffic with no configuration. A managed switch gives you control: VLANs, port security, traffic monitoring, and more. For any serious network, you need managed switches.
PoE (Power over Ethernet) delivers electrical power along with data over standard Ethernet cables. Instead of running separate power cables to cameras and access points, a single Ethernet cable handles both. PoE uses IEEE 802.3af (up to 15.4W), while PoE+ uses IEEE 802.3at (up to 25.5W) for devices needing more power.
SPAN (Switched Port Analyzer), also called port mirroring, copies traffic from one or more ports to a monitoring port. This lets security tools like IDS/IPS analyze network traffic without being inline. I'll mirror traffic to my Security Onion VM to detect threats.
For the exam: Know that switches operate at Layer 2, using MAC addresses to forward frames. Managed switches can have Layer 3 capabilities (routing). PoE injectors can add PoE to non-PoE switches. Port mirroring is essential for network forensics and troubleshooting.
Wireless: TP-Link BE11000
A WiFi 7 ceiling-mount access point that supports multiple SSIDs mapped to different VLANs. Guests get one SSID (VLAN 50), IoT devices get another (VLAN 30), and my trusted devices get a third (VLAN 10).
WiFi generations you should know for the exam:
- WiFi 4 (802.11n) - 2.4GHz and 5GHz, up to 600 Mbps
- WiFi 5 (802.11ac) - 5GHz only, up to 3.5 Gbps
- WiFi 6 (802.11ax) - 2.4GHz and 5GHz, up to 9.6 Gbps, better in crowded environments
- WiFi 7 (802.11be) - Adds 6GHz band, up to 46 Gbps theoretical
SSID (Service Set Identifier) is the network name you see when connecting to WiFi. Enterprise access points can broadcast multiple SSIDs, each mapped to a different VLAN. This lets you create separate wireless networks (Guest, IoT, Trusted) on one physical access point.
For the exam: Know that 2.4GHz has better range but more interference; 5GHz is faster but shorter range. WPA3 is the current security standard (WPA2 is still common). Understand the difference between autonomous APs (standalone) and controller-based APs (centrally managed).
Firewall: OPNsense (Virtualized)
After weighing the options, I made a practical decision: OPNsense will run as a VM on Proxmox rather than on dedicated hardware. Budget constraints made the $200-400 for a dedicated appliance hard to justify when I have capable hardware already running.
This approach uses the resources I already have:
- Intel X540 dual 10G NICs available for OPNsense
- eno1 (1Gbit) stays dedicated to Proxmox management - never passed to VMs
- Plenty of CPU and RAM headroom on the HP Z440
Yes, I learned the hard way about virtualizing routers (remember that pfSense lockout?). But this time I'm doing it right with proper separation and documented recovery procedures.
A firewall controls traffic between networks based on rules. It's the gatekeeper that decides what's allowed in and out. There are several types:
- Packet filtering - Examines individual packets (source/destination IP, ports)
- Stateful inspection - Tracks connection state, understands that a reply belongs to an existing conversation
- Application layer (NGFW) - Inspects actual content, can block specific applications or malware
OPNsense is a free, open-source firewall/router OS based on FreeBSD. It competes with commercial firewalls costing thousands of dollars. Key features include stateful packet inspection, VPN (OpenVPN, WireGuard, IPsec), intrusion detection, traffic shaping, and web filtering.
Virtualizing a firewall: Running OPNsense as a VM is common in homelabs. The key is keeping management access separate - if your virtualized router goes down, you still need to reach your hypervisor. I'm keeping eno1 (1Gbit) dedicated to Proxmox management while using the Intel X540 10G NICs for OPNsense with VLAN trunking.
For the exam: Firewalls use an implicit deny rule at the end - anything not explicitly permitted is blocked. Rules are processed top-to-bottom; first match wins. Know the difference between ingress (incoming) and egress (outgoing) filtering. NAT (Network Address Translation) allows multiple internal devices to share one public IP.
Current Services
One of the best things about a homelab is that it's never "done." You're always adding services, experimenting with new tools, and learning something new. Right now, my lab is running a mix of essential infrastructure and experimental projects. Each one taught me something - whether it was debugging container networking, understanding DNS at a deeper level, or figuring out why my AI assistant kept crashing at 3 AM.
Here's what's currently running:
$ docker ps --format "table {{.Names}}\t{{.Status}}"
NAMES               STATUS
twingate            Up 14 days
pihole              Up 14 days (LXC)
truenas             Up 14 days (VM)
claude-ai           Up 7 days
n8n                 Up 3 days (VPS)
- Pi-hole (LXC) - Network-wide ad blocking and DNS
- TrueNAS SCALE - Network storage and backups
- Twingate - Zero-trust remote access
- N8N - Workflow automation
- Claude AI - Local AI assistant
Pi-hole & DNS: DNS (Domain Name System) translates domain names (google.com) to IP addresses (142.250.80.14). Pi-hole acts as your network's DNS server but blocks requests to known ad/tracking domains by returning nothing. This blocks ads network-wide, even on devices that can't run ad blockers.
TrueNAS & NAS: A NAS (Network Attached Storage) is a dedicated file server. Instead of files scattered across devices, everything lives centrally. TrueNAS uses ZFS, a file system with built-in checksums (detects corruption), RAID-like redundancy, and snapshots for point-in-time backups.
LXC vs VM vs Docker: Notice the labels - LXC, VM, Docker. These are different virtualization approaches:
- VM (Virtual Machine) - Full OS with its own kernel, completely isolated but resource-heavy
- LXC (Linux Container) - Shares the host kernel, lightweight, Linux-only
- Docker - Application containers, packages an app with its dependencies, highly portable
Zero Trust (Twingate): Traditional VPNs put you "inside" the network. Zero Trust assumes the network is already compromised - every access request is verified individually. You only reach specific resources you're authorized for, not the entire network.
For the exam: DNS uses port 53 (UDP for queries, TCP for zone transfers). Know NAS vs SAN - NAS presents file shares (SMB/NFS), SAN presents raw block storage (iSCSI, Fibre Channel). Containers share the host kernel; VMs have their own. Zero Trust is a key Security+ concept.
Lessons Learned (So Far)
Here's the beautiful thing about homelabs: you will break things. You'll misconfigure a firewall rule and lock yourself out. You'll forget to save your switch config and lose an hour of work after a reboot. You'll discover that your "brilliant" network design has a fatal flaw at 11 PM on a Sunday. And every single one of those failures will teach you more than any textbook or practice exam ever could.
Even before completing this migration, I've collected some hard-won wisdom:
1. Never Virtualize Your Only Path to the Hypervisor
This one cost me hours of frustration. If your router is a VM, and your router is the only way to reach your hypervisor, you've created a dependency loop. Keep management access on a separate physical interface. That's exactly why my new design keeps eno1 dedicated to Proxmox management - the Intel X540 NICs handle OPNsense, but I can always reach Proxmox directly even if OPNsense is down.
2. Cameras Are a Security Nightmare
IP cameras are basically IoT devices with eyes. They run outdated firmware, have poor security practices, and often try to phone home. Solution: complete network isolation with no internet access. Monitor them via a SPAN port on a separate VLAN.
3. IoT Devices Can't Be Trusted
That smart plug controlling your lamp? It probably has a hardcoded password and hasn't been updated since 2019. Give IoT devices internet access only - no reason they need to see your file server.
4. Document Everything
Future-you will thank present-you. I'm maintaining detailed documentation in Obsidian with network diagrams, IP allocations, and change logs. When something breaks at 2 AM, you want answers fast.
The Migration Plan
Here's a critical lesson that applies to both homelabs and enterprise environments: never make changes without a plan and a way to undo them. I'm taking a phased approach where each step has documented rollback procedures. If something goes catastrophically wrong, I can always retreat to the previous state and try again. That's not failure - that's good engineering.
- Phase 1: Documentation (Current) - Document current state, design target architecture
- Phase 2: Router Deployment - Install OPNsense, configure VLANs
- Phase 3: Network Migration - Move devices VLAN by VLAN
- Phase 4: Security Hardening - Deploy Security Onion, enable IDS/IPS
IDS (Intrusion Detection System) monitors network traffic and alerts when it detects suspicious activity. Think of it as a security camera - it watches and records but doesn't physically stop anyone. It's passive.
IPS (Intrusion Prevention System) goes further - it can automatically block detected threats. Think of it as a security guard who can physically stop intruders. It's active and sits inline with traffic.
Detection methods:
- Signature-based - Matches traffic against known attack patterns (like antivirus definitions)
- Anomaly-based - Learns "normal" behavior and flags deviations
- Heuristic - Uses rules to identify suspicious behavior patterns
Security Onion is a free Linux distribution that bundles multiple security tools: Suricata (IDS/IPS engine), Zeek (network analysis), Elasticsearch (search), and Kibana (visualization). It turns network traffic into searchable security data.
For the exam: Know NIDS/NIPS (network-based) vs HIDS/HIPS (host-based). Understand false positives (alerting when nothing is wrong) vs false negatives (missing real attacks). IDS/IPS placement matters - typically at network boundaries or monitoring SPAN ports.
What's Next
Phase 1 is complete. The documentation is done, the architecture is designed, and the decision is made: OPNsense will run virtualized on Proxmox. Now comes the fun part - actually building it.
- Create OPNsense VM - Set up the VM with proper NIC passthrough and boot priority
- Configure VLAN interfaces - All 7 VLANs with proper addressing
- Set up DHCP and firewall rules - Per-VLAN DHCP scopes and initial security policies
- Test routing - Verify inter-VLAN routing works as designed
I'll be documenting every phase of this journey. Next up: Phase 2 - bringing OPNsense to life and watching those VLANs come online. Follow along, and feel free to build alongside me. There's no better way to learn than to do it yourself.
Why This Matters (Especially for Students)
Let me be direct: if you're studying for CompTIA certifications and you're only using practice exams and flashcards, you're leaving so much on the table. Certifications open doors, but hands-on experience is what proves you can actually do the job. When an interviewer asks "Tell me about a time you troubleshot a network issue," you want to have real stories - not just textbook definitions.
This homelab project touches nearly every objective across A+, Network+, Security+, and Server+:
- Network design - VLANs, subnetting, routing, switching
- Security architecture - Firewalls, IDS/IPS, defense in depth, least privilege
- Virtualization - Hypervisors, VMs, containers, resource allocation
- System administration - Linux, services, troubleshooting, documentation
You don't need expensive equipment to start. An old PC, a managed switch from eBay, and free software like Proxmox and OPNsense can give you an enterprise-grade learning environment for a few hundred dollars. The knowledge you gain is priceless.
Whether you're a fellow homelabber, a student just starting out, or an employer evaluating my skills - this project shows how I approach infrastructure: with curiosity, security-first thinking, and thorough documentation. I learn by doing, and I believe that's the best way to truly master this field.
Questions? Want to share your own homelab journey? I'd love to hear from you. Reach out through the contact page or connect with me on LinkedIn.